Using the blur image feature in an application can present a professional and engaging interface for users. This guide explores what the blur image in Flutter is, how you can efficiently use it in your application development project, and the techniques used to bypass common issues that might arise during the implementation process.
In this article:
- Importance of Blur Image in Flutter
- Step by Step Guide to Implementing Blur Image in Flutter
- Troubleshooting Common Blur Image Flutter Issues
- Dealing with Blur Image Errors
- Solutions to Common Blur Image Issues
- Blur Image with Flutter and Cloudinary
Importance of Blur Image in Flutter
A big chunk of designing user interfaces ensures the critical stuff stands out and is easy for users to see. The blur image feature is super handy for this because it helps organize the look of your app visually. It can highlight the most essential parts, drawing the user’s attention right where you want it. This makes your app easier to navigate and ensures a smoother experience for the user.
You can use the blur image feature in many ways in mobile app development. For example, it can make onboarding slides more engaging and easier to understand. It’s also great for giving app backgrounds a nice look, adding a cool touch to overlay screens, and designing menus, all of which create a pleasant atmosphere that users will enjoy.
Step by Step Guide to Implementing Blur Image in Flutter
Flutter’s BackdropFilter widget, coupled with the ImageFilter.blur function, makes blurring images a breeze. Here’s a simple guide to get you started:
Add Your Image
- : First, ensure you have an image widget in place. This can be any image from your assets or fetched from the web.
Image myImage = Image.asset('assets/my_image.jpg');
Apply the Blur Effect
- : Wrap your image with a BackdropFilter widget and use the ImageFilter.blur function to apply the blur. The sigmaX and sigmaY parameters control the blur intensity horizontally and vertically, respectively.
Widget blurredImage = BackdropFilter(
  filter: ImageFilter.blur(sigmaX: 5, sigmaY: 5),
  child: Container(
    child: myImage,
    decoration: BoxDecoration(color: Colors.white.withOpacity(0.0)),
  ),
);
Integrate the Blurred Image
- : Finally, incorporate your blurred image widget into your app’s widget tree wherever you need it.
This method not only enhances the aesthetic value of your website but also contributes to a smoother user experience by optimizing media content for faster loading times.
Troubleshooting Common Blur Image Flutter Issues
Software development invariably encounters hiccups, and blur image is not exempted. Some users may find issues when using the blur image, but thankfully, these problems come with feasible solutions. Here are some common issues and the corresponding measures to take.
Dealing with Blur Image Errors
Among the challenges you might encounter are blur image errors. Factors that can influence this include not importing the necessary dart packages and using an invalid image link. Additionally, very high blur filters (SigmaX and SigmaY) can also cause issues. To deal with these errors, ensure your packages are imported correctly, and your image link is valid. It is also advisable to keep your blur filters within an acceptable range.
Solutions to Common Blur Image Issues
Some common issues you might encounter are incorrect syntax, issues with the ImageFiltered widget, or problematic Flutter updates or installations. Resolving these issues may require using correct syntax, reinstalling Flutter, or adjusting the blur filter parameters. Thankfully, they are easy to diagnose and solve, ensuring a smoother development experience.

Blur Image with Flutter and Cloudinary
When making apps visually appealing, being able to change images on the fly is essential. We’ve already gone over the basics of adding blur effects in Flutter, but Cloudinary takes this further. It gives you more advanced options for working with images. With Cloudinary, you can do more complex things like blur or pixelate faces in pictures, which is excellent for privacy and improving your app’s design.
Cloudinary makes it easy for developers to add complex effects to images right from their Flutter apps. This part will show you how to blur or pixelate faces in your images using Cloudinary, helping you hide faces by either smoothing them out or turning them into pixels.
Blurring Faces with Cloudinary
Cloudinary allows you to set the effect parameter to blur_faces (e_blur_faces in URLs) to blur faces detected in an image. This can be done by using the following Cloudinary transformation code in your Flutter project:
// First we upload an example to Cloudinary
cloudinary.image('young_couple.jpg').transformation(Transformation());

// Then we apply the blur effect
cloudinary.image('young_couple.jpg').transformation(Transformation()
    .effect(Effect.blur()
    .region(Region.faces())
));

The default blurring value is 100, but it’s customizable between 1 and 2000, allowing you to adjust the level of blurriness according to your needs. For example, for a more pronounced blur effect, you might use a value of 1000:
// blur strength 1000
cloudinary.image('young_couple.jpg').transformation(Transformation()
    .effect(Effect.blur().strength(1000)
    .region(Region.faces())
));

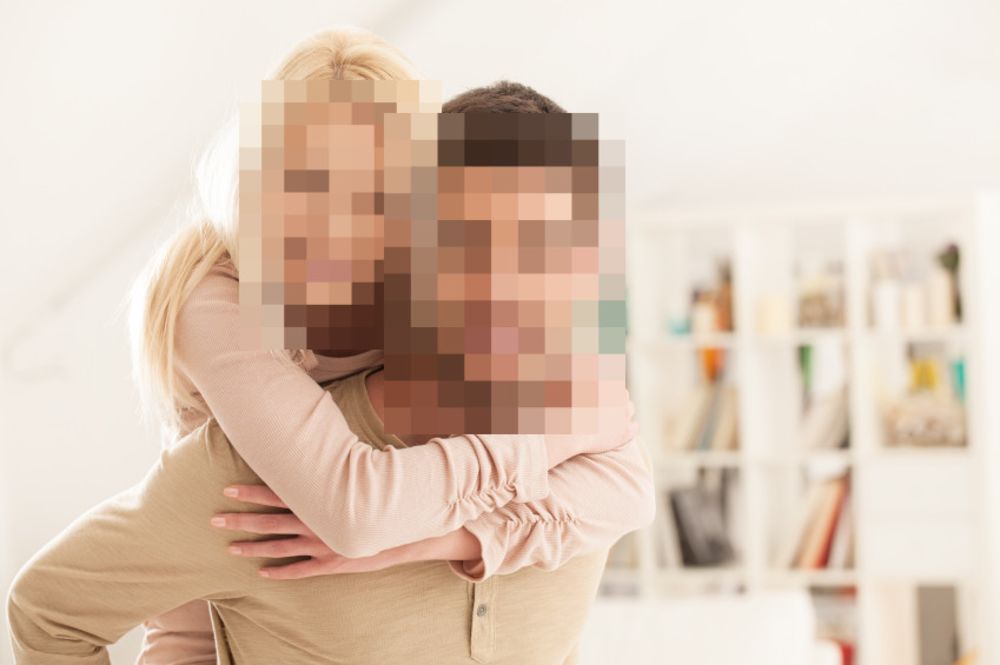
Pixelating Faces with Cloudinary
Pixelating faces is an alternative to blurring for applications requiring a different aesthetic or additional privacy. Set the effect parameter to pixelate_faces (e_pixelate_faces in URLs) to achieve this effect:
cloudinary.image('young_couple.jpg').transformation(Transformation()
    .effect(Effect.pixelate()
    .region(Region.faces())
));
Customize the size of the pixel squares for varied effects, from larger squares for more noticeable pixelation to smaller squares for a subtler effect. Examples of both larger (squareSize 50) and smaller (squareSize 10) squares pixelation are as follows:
Larger Squares:
cloudinary.image('young_couple.jpg').transformation(Transformation()
    .effect(Effect.pixelate().squareSize(50)
    .region(Region.faces())
));

Smaller Squares:
cloudinary.image('young_couple.jpg').transformation(Transformation()
    .effect(Effect.pixelate().squareSize(10)
    .region(Region.faces())
));

Final Thoughts
By combining the power of Flutter with Cloudinary’s advanced image processing capabilities, you can create more engaging, visually appealing, and privacy-respecting applications. Whether you aim to enhance the user interface with blur effects or protect user privacy through face pixelation, these tools offer a wide range of possibilities for elevating your app’s design and functionality.
Transform and optimize your images and videos effortlessly with Cloudinary’s cloud-based solutions. Sign up for free today!
;rgba(153,153,153,0.1);rgba(153,153,153,0.5)" dur="2s" repeatCount="indefinite" /></rect></svg>)